Baking the Perfect Smithfield Spiral Ham: A Complete Guide

Intro
Baking a Smithfield spiral ham is an experience that melds tradition with culinary technique. Known for its tender, flavorful meat and eye-catching presentation, a spiral ham is often chosen for special occasions. Understanding how to cook one properly can elevate any gathering. As people seek to refine their cooking repertoire, knowing the intricacies involved in preparing this dish becomes paramount. This article will provide you with an in-depth guide to baking a Smithfield spiral ham, encompassing key points that detail the entire process from selection to final serving.
Recipe Overview
Recipe Name
Baked Smithfield Spiral Ham
Cuisine Type
American
Ingredients
List of Ingredients with Measurements
- 1 Smithfield spiral ham (about 8 to 10 pounds)
- 1 cup of brown sugar
- 1/4 cup of honey
- 1/4 cup of Dijon mustard
- 1/4 cup of apple cider vinegar
- Whole cloves (optional)
Substitutions for Common Ingredients
- Substitute brown sugar with turbinado sugar for a different flavor profile.
- If honey is not available, maple syrup can serve as a sweet alternative.
- You may replace Dijon mustard with yellow mustard or whole grain mustard for a milder taste.
Understanding Smithfield Spiral Ham
Smithfield spiral ham is a culinary treasure, known for its distinctive flavor and texture. Understanding this particular type of ham is essential for anyone looking to bake it effectively. Knowledge about its origins and characteristics can significantly enhance the end result, transforming a meal into a memorable experience.
Smithfield hams have a rich history, originating from Smithfield, Virginia, where specific curing methods are employed. The unique preparation involves slow curing and smoking, which gives the ham its celebrated taste. This ham is typically spiral-sliced, making it easier to serve and enjoy.
This section will discuss what makes Smithfield ham unique and the different types available, facilitating an informed selection for your baking endeavors.
What Makes Smithfield Ham Unique
Smithfield ham is distinguished by its unique curing process. The ham is usually made from the hind leg of a pig, cured with a combination of salt, sugar, and sodium nitrate, creating a distinctive flavor profile. Additionally, the aging process contributes to its complexity and depth.
Many consider these hams a delicacy due to their rich taste and the craftsmanship behind their preparation. The hint of sweetness from the curing process, combined with a subtle smokiness, sets this ham apart from others.
Types of Smithfield Spiral Ham
When selecting a Smithfield spiral ham, understanding the types available can influence your choice. Two notable distinctions are bone-in versus boneless, and pre-glazed versus un-glazed.
Bone-in vs. Boneless
The bone-in option offers more flavor because the bone enhances the richness during cooking. Additionally, bone-in hams tend to be juicier due to the fat content and the way they retain moisture.
However, they can be more challenging to carve, requiring a bit more skill.
On the other hand, boneless hams are convenient for serving. They are easier to slice and present well on a platter. However, some argue they lack the depth of flavor found in bone-in variants, since they do not have the bone to aid in moisture retention.
Pre-glazed vs. Un-glazed
With pre-glazed hams, the manufacturer typically adds a glaze, such as honey or maple, which can save time during preparation. This can enhance the flavor profile and add an appealing shine to the finish.
Yet, relying on pre-glazed options can limit creativity for those who wish to apply their choice of glaze, potentially leading to a less personalized experience.
Conversely, un-glazed hams provide a blank canvas, allowing you to select or create a glaze according to taste. This option encourages experimentation, but requires a bit more effort to develop the same flavor richness that may come naturally with a pre-glazed ham.
In summary, understanding the uniqueness of Smithfield spiral ham and the various types available can greatly impact the preparation and enjoyment of the final dish. Different characteristics influence flavor, moisture, and ease of cooking, shaping how you approach baking a ham for any occasion.
Preparing for the Baking Process
Preparing for the baking process is a critical stage when dealing with Smithfield spiral ham. The success of your dish often hinges on proper preparation, making it essential to approach this phase with care. This section emphasizes key elements, benefits, and considerations inherent to preparing your spiral ham before it meets the heat.
Choosing the right size and weight of the ham not only impacts cooking time but also the flavor and texture after baking. Additionally, having the right tools and equipment can simplify the process and enhance the cooking experience. These preparations ultimately set the stage for a deliciously baked ham, enjoyed by all who partake.
Choosing the Right Size and Weight
Choosing the right size and weight for your Smithfield spiral ham is essential. A ham that is too small may dry out during cooking, while a ham that is oversized will increase your cooking time significantly. Most families prefer a ham between 8 and 14 pounds, as it provides ample servings without overwhelming the oven.
Here are some considerations for selecting the right size:
- Serving Size: Consider how many guests you will host. A general rule is to allocate about 1/3 to 1/2 pound per person.
- Bone-in vs. Boneless: Bone-in hams tend to be more flavorful and moist compared to their boneless counterparts. They often provide better presentation as well.
Understanding these factors allows for a more informed choice, ensuring satisfaction for both the cook and the guests.
Essential Tools and Equipment
Roasting Pan
The roasting pan is indispensable in the baking process of Smithfield spiral ham. A sturdy roasting pan allows for even heat distribution, which is crucial for cooking the ham uniformly. This tool is often made from stainless steel or heavy-duty aluminum, thus enhancing its durability.
Key characteristic: Size and shape are pivotal when it comes to roasting pans. The pan should be large enough to fit the ham without crowding, with high sides to prevent splatter.
Advantage: It catches juices that can be used for basting or for making gravy after the ham is baked. A poor-quality pan may warp in the heat, affecting the cooking process.
Meat Thermometer
A meat thermometer is another essential tool for baking Smithfield spiral ham. This device is crucial in ensuring that the ham is cooked to perfection, thus eliminating any guesswork.
Key characteristic: Digital meat thermometers provide fast and accurate readings, letting you know the internal temperature of the ham quickly. They often have an alert feature that can notify you when the desired temperature is reached.
Advantage: This tool helps to avoid overcooking or undercooking, which can compromise flavor and texture. Investing in a good meat thermometer pays off by ensuring consistent results.
Aluminum Foil
Aluminum foil serves multiple purposes in the baking process of Smithfield spiral ham. It helps to retain moisture, allowing the ham to stay juicy throughout the cooking process.
Key characteristic: Thickness matters; heavy-duty foil is best as it can withstand the heat of the oven without tearing.
Advantage: Foil can be used to tent the ham during the initial stages of baking. This layer locks in steam and promotes even cooking. After some time, foil can be removed to allow for browning and caramelization of the glaze.
Proper preparation and the right equipment can significantly influence the overall outcome of your Smithfield spiral ham. Ensuring that you choose wisely here will ultimately reflect in the dish’s flavor and presentation.
Thawing and Prepping the Ham
Thawing and prepping the ham is essential for achieving the best results when baking a Smithfield spiral ham. Proper thawing ensures that the ham cooks evenly, while the prepping steps maximize flavor and tenderness. Understanding this process is vital to avoid common pitfalls that can affect the taste and texture of the final dish.
Proper Thawing Techniques
Thawing the ham correctly helps preserve its quality. There are two primary methods to consider, each with unique benefits.
Refrigerator Method
The refrigerator method involves placing the frozen ham in the fridge for an extended period, allowing it to thaw gradually. This method is ideal because it keeps the ham at a safe temperature, reducing the risk of bacteria growth. Typically, plan for about 24 hours of thawing for every four to five pounds of ham. This is a beneficial choice as it minimizes the chance of uneven thawing.
A key characteristic of the refrigerator method is its consistency in warm temperatures. It ensures the meat stays uniformly cold throughout the thawing process. The downside is the required time; it can take up to several days to fully thaw larger hams. However, this time investment allows the meat to retain moisture and taste better after cooking.
Cold Water Method
The cold water method is faster. It requires submerging the ham in its original packaging into cold water, changing the water every 30 minutes. This method allows for a full thaw within hours. For those pressed for time, this approach can save a day or more compared to the refrigerator method.
While this method is quicker, it does require attention to ensure the meat remains submerged and the water is changed regularly. Additionally, maintaining a cold water temperature is important to minimize risks of bacterial growth. This makes it less reliable than the refrigerator method, especially for larger hams.
Preparing the Ham for Baking
Once the ham is fully thawed, preparation steps are necessary to ensure an enjoyable flavor and texture.
Removing Packaging
Removing the packaging is the first step in preparing the ham for baking. It may sound simple, but this step is important. Leaving plastic wrapping on can lead to undesirable chemicals leaching into the meat during cooking. Therefore, it is vital to make sure the ham is free from any plastic or other materials that might be present.
This removal is beneficial because it allows the ham to breathe, enhancing its flavor as it cooks. Ensure to handle the ham with care to avoid damaging its surface.
Scoring the Surface
Scoring the surface of the ham means making shallow cuts in a diamond pattern across the outer layer of fat. This step serves multiple purposes. It allows for better glaze penetration and helps the fat render and crisp during cooking. Additionally, this technique enhances presentation, giving the final dish an appealing look.
A notable feature of scoring is that it helps in flavor distribution throughout the meat. However, it is important to avoid cutting too deep, which can lead to dryness during baking. This technique is widely recognized for enhancing the overall cooking experience when baking a spiral ham.
Applying Glaze
Applying glaze is a critical step in the baking process. A well-applied glaze adds both sweetness and flavor, enhancing the overall dish. It is often an ingredient that reflects personal tastes, ranging from honey to brown sugar or even a spicy mustard blend.
The key characteristic of applying glaze is the timing; it is best to apply it during the last 30 minutes of baking. This prevents burning and allows the glaze to caramelize beautifully, adding depth to the flavors.
One unique feature is that glazing also promotes a shiny finish, contributing to the overall visual appeal of the dish. However, using too much glaze can lead to a sickly sweet taste, so balance is necessary.
In summary, the thawing and prepping steps are critical for achieving a perfectly baked Smithfield spiral ham. Proper preparation will maximize flavors and aid in the cooking process.
A thoughtful approach to these techniques can enhance the experience of baking and ultimately provide a more enjoyable meal.
Baking Methods
Baking methods are fundamental in achieving a well-cooked Smithfield spiral ham. Understanding how to utilize these methods offers multiple benefits, including enhancing flavor, ensuring tenderness, and managing cooking time effectively. The baking technique selected can significantly influence the final texture and taste of the ham. Therefore, it’s essential to grasp various baking options to suit personal preferences and achieve the desired culinary result.
Oven Baking Techniques
Temperature Settings
Setting the correct temperature is crucial when baking a Smithfield spiral ham. The typical recommended temperature is 325°F. This moderate heat allows the ham to cook evenly, ensuring the meat becomes tender without becoming overly dry. This temperature also facilitates the proper melting of any glaze applied, creating a flavorful crust.
The lower and gentle approach minimizes energy loss and promotes an even bake. However, if the temperature is too high, the exterior can brown too quickly, leaving the inside undercooked.
Baking Time Guidelines
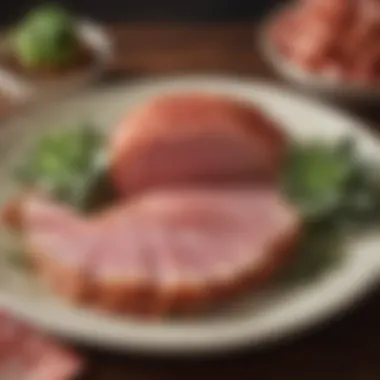

Baking time is a key component to achieve a well-prepared ham. Generally, baking takes approximately 10-15 minutes per pound at 325°F. This guideline helps in planning the timing of meal preparation, allowing for a smoother cooking process.
Considering that hams can vary in size, it's important to monitor the internal temperature rather than solely rely on time estimates. This helps avoid the risk of overcooking or undercooking, which could ruin the overall dish.
Using a Slow Cooker
Temperature Control
Slow cooking offers a unique way to prepare Smithfield spiral ham. Controlling the temperature is straightforward when using a slow cooker. Most models have settings ranging from low to high, allowing versatile cooking options. A setting of low heat can be ideal, typically around 190°F to 205°F, providing an environment that allows the ham to absorb flavors, remaining juicy throughout.
Utilizing a slow cooker can prevent temperature spikes, which can occur in a conventional oven, ensuring a consistently moist ham.
Benefits of Slow Cooking
The benefits of slow cooking a Smithfield spiral ham are numerous. One primary advantage is the enhanced flavor achieved during the cooking process. It allows the meat to absorb the essence of any spices or glaze used over a longer period.
Additionally, slow cooking generally requires less attention during the cooking process, freeing up time for other meal preparations. This flexibility makes it a preferred method for many home cooks seeking a manageable cooking experience—from busy parents to culinary enthusiasts.
By understanding these baking methods—oven techniques with specific temperature settings and time guidelines, along with the slow cooking approach and its benefits—one can optimize the preparation of a Smithfield spiral ham, ensuring a delicious end result. Each method presents its advantages, requiring thoughtful consideration to achieve the best outcome.
Monitoring the Cooking Process
Monitoring the cooking process is essential when baking a Smithfield spiral ham. This stage is crucial to ensure that the ham reaches the ideal internal temperature for food safety and optimal flavor. It involves careful scrutiny of several factors like time, temperature, and the overall appearance of the ham. Understanding these elements can significantly influence the quality and taste of the final dish.
Precise temperature control not only helps to cook the ham evenly but also prevents it from becoming dry or overcooked. As a culinary enthusiast, being keen on the cooking process enhances your ability to deliver a succulent and flavorful ham to the table.
Checking Internal Temperature
Checking the internal temperature is a fundamental practice when baking ham. The ideal internal temperature for a fully cooked Smithfield spiral ham should be around 140°F (60°C) for a pre-cooked ham. Using a reliable meat thermometer is recommended for accuracy. Insert the thermometer into the thickest part of the ham, avoiding the bone. This will provide the most accurate reading.
An undercooked ham can pose health risks, while an overcooked one can result in a dry and less appealing dish. Thus, monitoring the temperature ensures not just safety, but also helps in maintaining the rich flavors that spiral ham is known for.
Basting Techniques
Basting is another significant technique that enhances the flavor and moisture of the ham. During the baking process, you should baste the ham every 30 minutes with the pan juices or your chosen glaze. This adds an extra layer of moisture and flavor, allowing the seasonings to penetrate the surface of the meat.
Here are some tips for effective basting:
- Use a baster: A turkey baster allows for controlled and even distribution of juices.
- Avoid opening the oven door too frequently: Each time the door opens, the oven temperature decreases, which can affect cooking time.
- Consider your glaze: If using a homemade glaze, apply it during the last hour of cooking to achieve a caramelized finish without burning.
Proper monitoring of the cooking process, including checking internal temperature and effective basting techniques, elevates the quality and taste of your baked Smithfield spiral ham.
Resting and Carving the Ham
The steps following the cooking of Smithfield spiral ham are critical to enjoying the finished product. Resting and carving adequately can significantly impact the final presentation and taste. The resting phase allows the juices of the ham to redistribute, ensuring a moist and flavorful eating experience. Further, proper carving techniques ensure each slice maintains the ham's quality while offering beautiful presentation on the dining table.
Importance of Resting
Resting the ham for at least 20 to 30 minutes after baking is essential. This process is often overlooked. During this time, the muscle fibers of the ham relax. If you slice into the ham too soon, the juices will run out, leaving dry slices. Allowing the meat to rest retains moisture. Also, the temperature stabilizes, making it easier to carve. This resting period enhances flavor, texture, and overall enjoyment of the dish.
"Resting is one of the most overlooked steps in ham preparation. It can dramatically affect the quality of the final dish."
Carving Techniques
Carving the ham correctly is almost as important as cooking it well. The technique used impacts both the texture and appearance of the slices. Here are two crucial aspects to consider:
Slicing Against the Grain
Slicing against the grain is a technique that ensures tenderness. The grain refers to the direction of the muscle fibers. Cutting against it shortens these fibers, leading to softer bites. This method of slicing greatly contributes to the overall quality of the ham experience.
A key characteristic of slicing against the grain is that it creates more appealing slices. Each piece will look more inviting and uniform. Additionally, short fibers enhance the eating experience, making each bite enjoyable. This technique is a beneficial choice for enhancing the overall dish.
Using the Right Knife
Using a proper knife is essential for effective carving. A long, sharp carving knife is recommended for smooth, even slices. The design of such knives allows for nice cutting motion. A proper knife helps maintain the overall look of the ham.
The key characteristic of using the right knife allows for precision and control. This choice facilitates cleaner cuts. As a consequence, presentation improves significantly. Not choosing the right knife can lead to uneven slices and tearing of the ham, diminishing its visual appeal.
Serving Suggestions
Serving suggestions play a significant role in enhancing the overall experience of enjoying a Smithfield spiral ham. This section is aimed at providing thoughtful ideas that complement the main dish, making the meal more satisfying and enjoyable. When considering serving suggestions, it's essential to think about the balance of flavors, textures, and presentation.
By selecting the right side dishes and arranging the meal artistically, you can create a feast that not only delights the taste buds but also pleases the eyes. This guide aids in ensuring that your Smithfield spiral ham is not merely a centerpiece but part of a cohesive dining experience that brings joy to all who partake.
Complementary Side Dishes
The right side dishes can elevate a Smithfield spiral ham from a standard meal to an exceptional gathering. Some popular accompaniments include:
- Garlic Mashed Potatoes: Creamy and smooth, these potatoes provide a rich texture that contrasts well with the savory ham.
- Green Bean Casserole: This dish adds a touch of freshness and crunch, complementing the saltiness of the ham.
- Honey-glazed Carrots: The natural sweetness of the carrots pairs beautifully with the ham's flavors.
- Cornbread: Its slightly sweet and crumbly nature rounds out the meal perfectly.
Each of these dishes enhances the dining experience by providing varied flavors and textures. They not only serve as a support to the main dish but also offer an opportunity for creativity and personalization. Consider seasonal vegetables or local specialties to tailor the meal to your tastes and those of your guests.
Creating a Beautiful Presentation
Garnishing
Garnishing serves as the finishing touch that can transform a simple dish into a work of art. The use of garnishes adds color, texture, and an extra layer of flavor to your plate. Common garnish options for Smithfield ham include fresh herbs like rosemary or thyme, and citrus slices that can brighten the dish.
The key characteristic of garnishing is its ability to elevate presentation without overwhelming the main flavors. It is a beneficial choice because it encourages creativity while maintaining balance.
One unique feature of garnishing is its versatility; you can easily adjust the style to suit different occasions. However, be mindful not to overdo it, as this could distract from the ham itself. A well-placed garnish can invite anticipation and excitement before the first bite.
Plating Ideas
Plating ideas focus on the arrangement of food on the plate, which significantly impacts the diner's perception and enjoyment. A clean, structured design helps highlight the main elements of the dish while allowing for additional side items to shine.
The key characteristic of effective plating is simplicity. A clean presentation allows the vibrant colors and textures of the food to stand out, helping to convey freshness and quality. Plating efficiently enhances the dining experience, making it popular among culinary enthusiasts.
A unique feature of plating is the use of contrasting colors and shapes, which can draw the eye and stimulate appetite. You might also choose to layer components or use circular designs to guide the observer's gaze. While a simple plate can be elegant and effective, overly complex arrangements may confuse the diner, taking away from the meal itself. Focus on clarity and connection between the flavors to create an inviting dish.
Storing Leftovers
Properly storing leftovers is crucial for both food safety and flavor retention when it comes to Smithfield spiral ham. After enjoying a festive meal, it is common to have extra ham. Knowing how to store and reheat these leftovers can make a significant difference in the quality of subsequent dishes. This section will cover effective storage methods and various reheating options to ensure your remaining ham maintains its delicious taste and safe consumption.
Proper Storage Techniques
First, when it comes to storing ham leftovers, avoid leaving them out at room temperature for more than two hours. Bacteria can grow rapidly between temperatures of 40°F and 140°F. Following your meal, the ham should be wrapped tightly in plastic wrap or aluminum foil. This minimizes exposure to air, preventing the meat from drying out or absorbing other odors from the refrigerator.
Sealing the ham in an airtight container can also be an effective method. Depending on the size of the leftovers, cut the ham into smaller portions for easier storage and reheating later on. Labeling packages with the date of storage can be helpful, as it aids in recognizing how long the ham has been in the fridge. Typically, leftovers can last for three to five days in the refrigerator. If you want to store them longer, consider freezing portions of the ham, where it can remain good for up to three months.
Reheating Options
When it comes to reheating your ham leftovers, there are two popular methods to consider: the microwave method and the oven method. Each has distinct advantages and is suitable for various situations based on time and desired outcome.
Microwave Method
The microwave method stands out due to its speed and convenience. The key characteristic of this method is the rapid reheating process, making it perfect for quick meals. Simply place the ham on a microwave-safe plate and cover it lightly with a damp paper towel to retain moisture during cooking.
This method is benefical for those who need a fast solution for leftover ham. However, it has its downsides. One common disadvantage is that it can lead to uneven heating, meaning some parts of the ham may become too hot while others may remain cold. The texture can also suffer, often resulting in a rubbery consistency rather than the desired tender meat. Despite this, the microwave remains a popular choice for its efficiency.
Oven Method
On the other hand, the oven method allows for a more even heating process, offering a better overall texture and flavor. When using this method, preheat the oven to around 325°F (163°C). This slower reheating process helps preserve the ham's moisture and taste. Place the ham in a roasting pan and cover it with foil to prevent it from drying out.
A unique feature of the oven method is the opportunity to add a dash of glaze or a sprinkle of seasoning before reheating. This can enhance the flavor further and make enjoying the leftovers more exciting.
While the oven method takes longer, it usually results in superior taste and quality compared to the microwave. Thus, it is best suited for those who can wait a little while longer for their meal.
Common Mistakes to Avoid
When baking a Smithfield spiral ham, several pitfalls can undermine your efforts. Understanding common mistakes is critical to achieving the desired flavor and texture. By avoiding these missteps, you can ensure a successful cooking experience and a delicious outcome.
Overcooking or Undercooking
Overcooking a Smithfield spiral ham can lead to a dry, unappetizing result. This typically occurs when the internal temperature exceeds a safe threshold. For optimal results, aim for an internal temperature of 140°F (60°C) for pre-cooked hams. An accurate meat thermometer is essential to assess doneness. Overcooking detracts from the natural juiciness that these hams should offer.
Conversely, undercooking poses a risk both for flavor and safety. If the internal temperature remains below the recommended level, the ham may not be safe to eat. It is important to monitor cooking time closely, even when relying on guidelines. Remember, every oven can vary slightly in temperature accuracy, impacting cooking times.
Here are some quick tips to prevent these mistakes:
- Use a meat thermometer for classic accuracy.
- Follow recommended baking times based on the weight of the ham.
- Allow for resting time post-baking, as the temperature will continue to rise slightly.
Ignoring Glaze Application
Glaze application often transforms a regular Smithfield spiral ham into a culinary delight. Ignoring glaze can lead to a lackluster flavor and dull appearance. Although many hams come pre-glazed, you might choose to add your own mixture or modify existing glazes to enhance the taste.
Applying the glaze at the right time is critical. If added too early in the baking process, it may burn and lose its intended sweetness. Conversely, adding it during the last stages of cooking can create a sumptuous, caramelized coating.
Consider these points for effective glaze application:
- Brush the glaze on during the final 30-45 minutes of baking.
- Keep basting the ham with the glaze for a richer flavor.
- Experiment with different glaze ingredients such as honey, brown sugar, or mustard to personalize the flavor.
Utilizing these insights will not only elevate your cooking but also enhance your overall ham experience. By steering clear of these common pitfalls, you set the stage for a memorable meal that will impress all who partake.
Ending and Final Thoughts
Baking a Smithfield spiral ham is not merely a cooking task; it is an art form that enables one to enjoy a delicious and substantial meal. Understanding the full scope of this process is crucial. Many often approach the task without a clear strategy, resulting in unsatisfactory outcomes. This article has provided a comprehensive look at the various elements involved, from selection to baking, and ultimately serving the dish. In doing so, it highlights the significance of each step in ensuring a perfect result.
The benefits of mastering this culinary skill extend beyond just the immediate enjoyment of a meal. Gaining familiarity with the process allows for flexibility and creativity in the kitchen. Attention to detail can turn a simple family dinner into a memorable occasion. Therefore, considering each aspect presented in this guide is essential not just for novice bakers, but also for seasoned chefs looking to refine their techniques.
By understanding the importance of every phase, you can avoid common pitfalls and enhance your overall culinary experience. This is not a task that ends with just preparing and serving. It is an ongoing journey of exploration and mastery.
Recap of Key Points
- Unique Qualities of Smithfield Ham: The article has detailed what distinguishes Smithfield Spiral Ham from others, emphasizing its flavor and texture.
- Preparation: Essential tools like a roasting pan and meat thermometer were discussed, underlining their importance in the baking process.
- Baking Techniques: Different methods, such as oven baking and slow cooking, were outlined, giving you options depending on your resources.
- Post-Baking Steps: The significance of resting the ham before carving and serving was made clear, reinforcing how this affects flavor and texture.
- Storing Leftovers: Proper storage and reheating methods ensure you enjoy your ham long after it has been baked.
Encouragement for Experimentation
As with any culinary skill, practice leads to mastery. Do not hesitate to explore variations in your approach. Perhaps you can try different types of glazes or experiment with herbs and spices. Each time you bake, observe the changes and adapt accordingly. This encourages growth in your cooking skills.
Ultimately, the most valuable lessons often arise from trial and error. Embrace the process, as it allows you to discover your unique preferences and tastes. Remember, there are no absolute right or wrongs in cooking; it is about creating something enjoyable. Let your creativity flow while baking can elevate your skills and result in remarkable meals that you can share with others.


